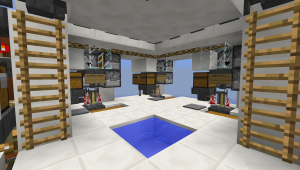
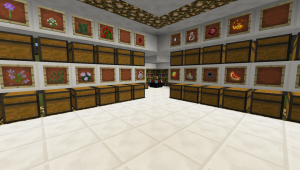
Archive for the 'Minecraft' Category

A Minecraft Modpack: A-Roving

Sunday, January 19th, 2020

With the advent of Minecraft 1.15.1, there came modpacks. And face it, playing Minecraft without automapping (and probably veinminer/ore excavation) feels rather weird. So I started looking at them, and soon found out, there are even now a lot more mods for 1.15.1 than are included in modpacks. So I made my own:

It’s available at https://www.curseforge.com/minecraft/modpacks/a-roving.

A-Roving is focused on roving, wandering, exploration, spelunking and dungeoneering. It still features some tech and basically is a kitchen-sink pack, but the focus is on stuff that either makes exploration interesting like ruins and generated structures, or that supports it, like backpacks and diving gear.

The one thing it’s not focused on, is building. While some mods add to the block palette, I explicitly left out things like Structurize or MrCrayfish’s Furniture mod, as they add mostly a lot of blocks. But there are some things in there that add light options (including the MegaTorch, which allows you to use low light levels without having to fear spawning) and redstone controlled contraptions.

Also left out are things that change gameplay completely, like “Lycanites mobs” (which looks ugly, by the way, and wrong).

As of now it’s one of the bigger modpack for 1.15.1 with 150 mods, but there are still a lot of mods missing that are not yet on 1.15.1 or have no replacement. Some tasks like mob farms will require combinations of vanilla and modded ingenuity.

It’s also configuration-light, meaning most of the mods behave as the mod-makers intended, I intend to change the configs as I go and find “undesirable” behavior, like lootbags containing creative power sources (which should be fixed in version 1.0.0 already).

Bad Minecraft Mods

Wednesday, October 10th, 2018

There are some mods for minecraft out there, that are just plain bad, not because of code quality or because they contain bugs and are badly maintained, but because they’re subscribing to some kind of philosophy that’s actually hostile towards the player. In most cases, nobody would use them, but sometimes these mods get entrenched into modpacks where they become a nuisance to a lot of players. I likely did forget some things, and maybe people will tell me that this-and-this feature(!) has been fixed, but on the whole I gather I’m right, and these mods are not going to change what I’m criticising. Since I don’t want to post a worst-of-list, but detail where they fail, they’re sorted alphabetically.

Avaritia

Avaritia offers some extremely powerful weapons and armour, which it tries to counterbalance with two things:

  • Idling to wait for enough stuff to build up in some strange machine whose main purpose is to be slow (you need thus a lot of those) or for stuff to build up in you system (like hundred-thousands of blocks of something), to move into some other machine, very slowly, to convert into something. To add to the insult, if you break the machines, you loose all content; like tens of thousands of iron blocks.
  • Clicking various stuff into place in an oversized crafting table that can hold much more different ingredients than your inventory, thus making any effort of automatic filling in of the recipe useless. And if the recipe is simpler than 36 ingredients , you’re sure to need something like 58 stacks.

Sounds familiar?

Buildcraft

Buildcraft is intended to goad players into overloading servers by having things that will behave badly and produce lag, unless the player knows exactly what he’s doing.

  • Hose’d It’s not a pipe, it’s a hose, and the player needs to throttle the feed, or it will spill and kill the server. But maybe it will anyway, since it runs on random ticks and likes to spill on chunk boundaries. And you need to power pipes, and these engines produce, you guessed it, lag.
  • Not Invented Here Needs its own incompatible power system, which is basically the same, but incompatible. Oh wait, replaced the compatible one with an incompatible one.

Factory Tech

Factory Tech is for making replacement parts that constantly break for Factory Tech machines that constantly break.

  • Russian Dolls Sorry, but to craft the thing you need, you need to craft 5 more machines. Actually, a complete production line for all these machines, because you need to supply them with parts that constantly break.
  • Micro Stacks So you can’t stack up on parts and need to set up a production line. Really.

This might be an interesting mod if you really wanted to decide on it, like for a modpack that does not have RF or its equivalents at all; but if you run into it in any other context, it’s an exercise in frustration.

Forestry

It’s about beekeeping. It doesn’t care whether you only wanted to grow trees, now you’ll do beekeeping.

  • Wrong Path The main problem is, in order to pollinate trees, you need to breed bees, and you basically need to go into a rabbit-hole of bee breeding, just to get the right kind of bees.
  • Mutations There’s a huge tree of species; actually two trees, one for bees and the other for trees to mutate around. If you’re lucky. In fact, you’ll be so unlucky, there’s a mod called Gendustry out there that allows you to tone down the randomness and with some effort get the species you want.
  • Weird machines You need several machines that are basically useless for everything else. Some also need electronic parts, which are also useless everywhere else, and are made by other weird machines.

There’s actually a lot of interesting stuff in Forestry, but the mechanisms force you to do microcrafting and follow paths — for a long time — you didn’t actually intend.

Hats

Because novelty is only funny once.

  • Not Hats. Putting weird shit on your head doesn’t make it hats. Believe me, I’m the guy who has a collection of more than 100 actual hats, caps and helmets.
  • Visual Mis-cue Sometimes probably intended, you see something and think there might be something special, but it’s only some stupid thing on the head of a mob.

IndustrialCraft 2

The use of IndustrialCraft is to craft and power IndustrialCraft machines.

  • Hostile to other mods. It actively tries to do it’s own thing, to the point of sabotaging interoperability-efforts of other mods. For instance other power-systems than its own, but also stuff that tries to pick up its blocks, or stuff that feeds to/from IndustrialCraft machines.
  • Things fail Machines will explode if they get too much power. And they always used to break if somebody tried to pick them up with a pickaxe, and even sometimes if done with the proper wrench. Which is just a nightmare for new players to figure out how this mod is supposed to work.
  • Not documented Lots of weird and inexplicable behaviour, not documented. And even the textures are nondescript, which adds to the general impression of hundreds of (machine?-)blocks with no purpose (apparently it’s only 98).
  • Microcrafting You will need a lot of these machines, just to get the parts done for other machines. And then you need to craft things from things to craft things to craft things.
  • Highly Illogical It’s got a power system on it’s own. Not one that’s more realistic, but one that’s totally absurd; like needing a transformer at the plant for every thing that uses power. And did I mention everything explodes if it gets too much power?
  • Abomination What highly illegal thing is this?

    A crafting table with multiple items in the same slot need for one craft. An abomination.

    multiple items in same slot for ONE craft

Lordcraft

The real clicker game. It’s even worse than Avaritia.

  • Clicker It has its own crafting bench, which needs to get some kind of power from another block, where you need to feed in crystals; but the really bad thing about this crafting bench is that you need to click for every item that is being crafted. Wait a few seconds until its crafted, click again. Of course it ignores redstone clocks.

Magneticraft

The evil twin of Immersive Engineering

  • Powerless Magneticraft feels somehow like the modern cousin to Immersive Engineering, the logical extension to it. But it does not accept power from it. Magneticraft does have a real-world electrical system itself, but there is no reason not to just convert RF to Joules and RF per ticks to Watts. The voltage could be ignored or converted to LV/MV/HV where available. But no.
  • Interface unclear Especially for the multipart machines, it’s entirely unclear where the in- and outputs are, and why the machine doesn’t get power and so on.

Modern Industrialization

It takes 13 blocks of material to make a machine of one block size

  • Massive amounts & Microcrafting A basic pump (one block) takes 81 copper and 24 tin. And the “Forge Hammer” you need for micro-crafting the 3 different bits of each of the nine-parts of the two rotors takes 49 Iron.

Tech Reborn

Tech Reborn has gotten a lot better actually, so maybe this should even be removed. In fact, I’ve grown to like Tech Reborn in 1.19.2 and later.

  • Microcrafting Everything needs complicated things, preferably made by other machines.
  • Powerless All the generators are measly, except the end game one, and particularly egregious is the diesel generator which takes more energy for the making of diesel than it produces.

Minecraft: Zeppelin for Skyblock Worlds

Wednesday, February 28th, 2018

Apart from floating Islands, the other big theme that makes itself obvious for modded Minecraft Skyblock worlds, is airships.

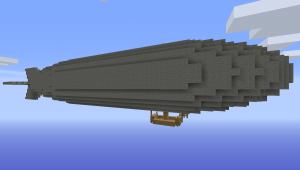
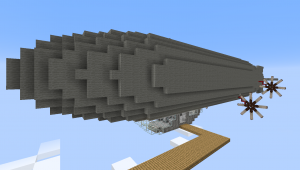
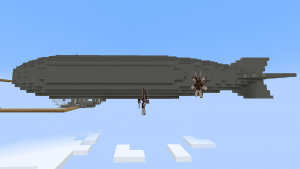
Planetminecraft is full of these Airships; most follow some steampunk theme and feature a huge ship hanging from a ridiculously small bag. A few are actual zeppelins or blimps, but the most beautiful of them are usually replica of historical ones, like LZ127 (236m long, 30m diameter) or LZ129 Hindenburg (245m long, 41m diameter).

What I needed was a zeppelin that would look like a zeppelin regarding the dimensions, but smaller. If it’s about loaded chunks, you don’t want to get all out.

So basically the requirements where these:

  • It may have the maximum diameter of a chunk, that means 16
  • Diameter must be an odd number, so 15 it is
  • It should have a fitting length to get decent proportions relative to the diameter, something like a ratio of 1:6 (LZ129 has exactly that one; LZ127 has one of 1:7.5)
  • Easy to build with skyblock resources. But not requiring any modded blocks.
  • schematic for the use with the schematica-mod

In the end, I made two versions, one out of cobblestone, for building early in the game, but which could be a liability if your modpack doesn’t have something like a swapping wand; and a mid-game version in grey wool, completely lightened out and carpeted.

In all honesty, I didn’t try out the cobblestone-version, as I managed to get a lot of string very fast in different modpacks. Also, the models feature a very bare-bone gondola, which I never built in survival. Instead I built good-looking ones, out of aluminium. There are no motor-gondolas either.

Schematics

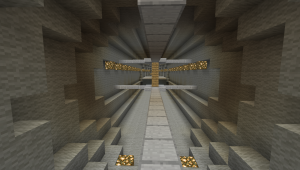
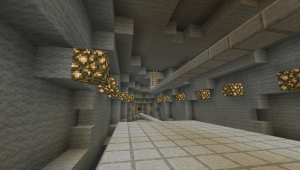
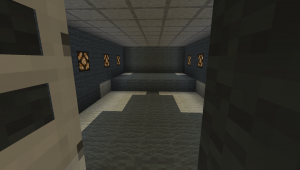
And here how it looks on the inside:
View from the front doorView towards the back
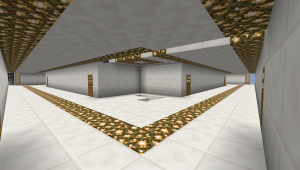
This is all without any modifications, straight from the schematic. It features 3 walkways, two hatches on top, a hatch to the gondola on the bottom, and a door at the front. Also, a room, lit by toggleable redstone lamps, which is something like 24 blocks from the gondola away, in other words, pre-made and suited for a small mob-farm, with still the whole bow to spare as workplace.

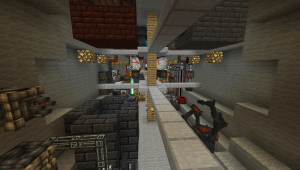
When I used this within “Modern Skyblock 3 Departed“, I put some windmills in place where the motor gondolas would reside, and put a decent gondola into place:

These didn’t provide enough energy, so I put some solar panels on top, behind glass:

Because the interior takes a lot of power:

Especially the cloches from “Immersive Engineering” I installed, which basically produce every resource imaginable via “Mystic Agriculture”. You can see the watermills from “Extra Utilities 2” producing GP as well.

Block usage of the woolen version, in order of importance:

  • 3089 Light Gray Wool
  • 1838 Light Gray Carpets
  • 415 Gray Wool
  • 62 Glowstone
  • 20 Redstone
  • 8 Redstone Lamps
  • 4 Levers
  • 2 Iron Doors
  • 33 Oak Wood Planks
  • 308 Stone Slab
  • 18 Ladders
  • 3 Wooden Trapdoors
  • 15 Oak Fences
  • 20 Oak Wood Slabs

In total, 4728 wool, 1644 ink and 3081 bonemeal.

Vive Linux

Monday, December 5th, 2016

I’ve got a HTC Vive, and I managed to get it to work, and – more importantly – to get several applications to work with it.

Kernel

The Vive comes with a link box that connects to USB and HDMI, so you need to have some drivers compiled in. The following might be somewhat nonstandard, or at least I haven’t had to use them before I got the Vive.
CONFIG_USB_HIDDEV=y
CONFIG_SND_USB=y
CONFIG_SND_USB_AUDIO=m
CONFIG_SND_HDA_CODEC_HDMI=y

Also, you need to give your user some permissions on these devices via udev-rules. The debian-package steam-devices will actually install one, but apparently this is not enough, thus:
ACTION=="add", KERNEL=="hidraw*", ATTRS{idVendor}=="0bb4", ATTRS{idProduct}=="2c87", TAG+="uaccess"
ACTION=="add", KERNEL=="hidraw*", ATTRS{idVendor}=="28de", ATTRS{idProduct}=="2000|2101", TAG+="uaccess"

Or something thereabouts. Using TAG+="uaccess" is the modern version you should use instead of MODE="0666" or somesuch.

X11

I actually wasn’t able to tell my system it should use the DisplayPort first, if a HDMI device was plugged in. So I need to boot first, and only then plug in the HDMI cable to the link box. This also has the effect that my X11 usually has no idea about the Vive, and it needs to be activated to work. You can set the Vive display as active in nvidia-settings (for nvidia, GPUs obviously). This looks like this then:
$ xrandr --listmonitors
Monitors: 2
0: +DP-0 1920/477x1080/268+0+0 DP-0
1: +HDMI-0 2160/122x1200/68+1920+0 HDMI-0

Building Vrui

The first thing I read about anything working with the Vive on Linux, was this post: I Am Using VR on Linux with My Vive and Vrui. I actually had tried an earlier version of Vrui before, but failed. But 4.2-006 actually works. However, there are no debian-packages, it’s not even available to clone from some RCS, there seems to be only a tar-ball, and along with it even a bash-script to build it.

Since I think bash-scripts and wget to build software is 1980ies I only followed it somewhat. First, get dependencies:
apt-get install build-essential g++ libudev-dev libdbus-1-dev libusb-1.0-0-dev zlib1g-dev libpng-dev libjpeg-dev libtiff5-dev libasound2-dev libspeex-dev libopenal-dev libv4l-dev libdc1394-22-dev libtheora-dev libbluetooth-dev libxi-dev libxrandr-dev mesa-common-dev libgl1-mesa-dev libglu1-mesa-dev libxine2-dev
Note the libxine2-dev which the script doesn’t install.

I then edited the makefile, where I changed a load of hard-coded variables around, and also set known paths like STEAMVRDIR to where I knew it would find it, because it would otherwise do find over my home-directory.

As it turned out, my build environment was also too new, it bombed on the C++ 11 ABI. I had to put
CFLAGS += -D_GLIBCXX_USE_CXX11_ABI=0 into the makefile. And since we’re on it, put it into ExamplePrograms/makefile as well, but take care that it goes below the include-statements.

After compiling and installing, it’s ready to run. If you haven’t installed the udev-rules yet, Vrui comes with some decent ones. And you can also change directory to ExamplePrograms, and build and install these as well. And copy over the Share/RunViveTracker.sh to where its useful.

Running Vrui

First off, start RunViveTracker.sh and keep it running.

Now you first want to run EyeCalibrator -rootSection Vive, which will display a window within the Vive, that will show you to how many millimetres you set the interpupillary distance with the knob on the right of the Vive. Read Technology Transfer for more information.

The next thing is RoomSetup Vive. Note that you don’t want to set a rootSection here, as you want it to display on the desktop. Vive la Vrui! will basically walk you through this. The room setup will define the area for the Screen Protection (that is the green wireframe) which will pop up if you move too near to the room borders.

After that, you’re ready to go, to use something like ClusterJello -rootSection Vive. See I Am Using VR on Linux with My Vive and Vrui for more.

VruiXine

If libxine2-dev was already available while building the Vrui examples, VruiXine should already have been compiled. As usual, it’s started with VruiXine -rootSection Vive, if you want it to use a different audio output than pulseaudio, you can set that with -ao alsa or something like that.

For me, VruiXine always starts with the window at an angle about three metres to the left. Upon clicking on “theatre”-mode in the menu, this gets fixed and the window is in front of me. Or I can start it with -vo theater (careful: American spelling: “theater”). Also menus appear in five metres distance initially, but pulling them up again will subsequently display them near me and readable. The “Save”-button in the DVD menu, will save the streaming settings and display mode (window/theatre), but not the window size and position, and it will save it into the folder the movie is in, with the name of the movie and .cfg added. So all the settings are movie-specific.

Also, unless you’re sitting in the middle of your VR space, you might need to disable the Screen Protector lest you constantly have green wire frame in your movie. Apparently you can do this in the menu “Vrui System”->”Devices”, but I just set screenProtectorDevices ( ) in ~/.config/Vrui-4.2/Vrui.cfg.

You can see which config-files are used by starting it with the -vruiVerbose flag.

See also the “Watching Movies” section on Vrui on Oculus Rift DK2

CaveQuake

CaveQuake is a Quake3 map viewer that sets up on Vrui. See Quake III Arena Maps in VR, under Linux, with Vive+Vrui on how to set this up.

One important thing to note is that here as well, I had problems with the C++ 11 ABI. In the installed share/Vrui-4.2/make/BasicMakefile I put in EXTRACSYSFLAGS += -D_GLIBCXX_USE_CXX11_ABI=0 So everything compiled against Vrui in the future would get this flag set. For CaveQuake itself, I also did set export EXTRACSYSFLAGS += -fPIC temporarily to compile.

The controls you get with “Walk” are this green thing on the floor, which is meant to be leaned on/off to move you. Which is really made for use in a Cave, and not in a Couch. Sadly, I have not yet found any option to control movement via keyboard, or even via those Vive controllers.

Apparently, most menu items in the Vrui control menus are really not menu items, but tool bindings, things you can bind to your controllers, save with “Vrui System”->”Devices”->”Save Input Graph” and load with -loadInputGraph on the commandline. Still, I don’t quite understand how this works.

Vivecraft
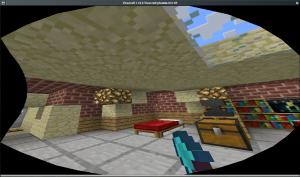
Vivecraft on Linux

Vivecraft on Linux

There is a Minecraft mod for using the Vive, called Vivecraft. You can get it from https://github.com/jrbudda/Vivecraft_110 but I haven’t been able to build it myself yet. So I used this: vivecraft-1.10.2-Vivecraft-jrbudda-6r4-installer.jar.zip
There are some other versions flying around, but they may lack the native Linux libraries. Also, you need Minecraft of course.

Now, in order to get this working, I needed the 64bit versions of the SteamVR libraries driver_lighthouse.so and libaitcamlib.so. The main problem were dependencies, since my system does not usually have such outdated libraries as libudev.so.0. The first attempt was to use the Steam-environment, but that includes dozens of outdated libraries, which in turn resulted in java not working. So I symlinked only the necessary libraries to where they were needed:
cd ~/.steam/SteamApps/common/SteamVR/bin/linux64
ln -sf ~/.steam/ubuntu12_32/steam-runtime/amd64/lib/x86_64-linux-gnu/libudev.so.0.13.0 libudev.so.0

And wrote a little startup-script:

#!/bin/sh
DRIVERDIR=~/.steam/SteamApps/common/SteamVR/drivers/lighthouse/bin/linux64
COMMONDIR=~/.steam/SteamApps/common/SteamVR/bin/linux64

export MESA_GL_VERSION_OVERRIDE=4.1
export MESA_GLSL_VERSION_OVERRIDE=410
export __GL_SYNC_DISPLAY_DEVICE=DFP-5

export LD_LIBRARY_PATH=$LD_LIBRARY_PATH:$DRIVERDIR:$COMMONDIR
cd ~/.minecraft
/usr/lib/jvm/java-8-openjdk-amd64/bin/java -Xms2048M -Xmx2048M -jar Minecraft.jar

You might need to change that DFP-5 there, that’s the HDMI port your Vive sits on.

With that, it starts, and as long as the Vive can not see the base stations it displays the main menu. However, when I put it on, the menu is only visible up to the far right. There’s a “Reset Origin” menu item, and if you place your mouse on that before putting on the Vive, and click on it afterwards, Vivecraft kinda works. You can walk around, destroy and place blocks and so on. All with you mouse and keyboard. What’s not working for me is the menus and inventories, as I suspect they pop up somewhere where I can’t see them.

See also the issue on github.

Minecraft: Item Sorting System

Sunday, May 22nd, 2016

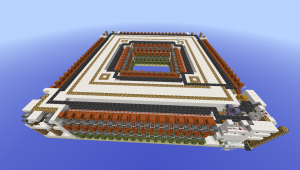
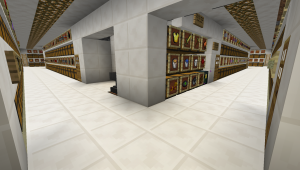
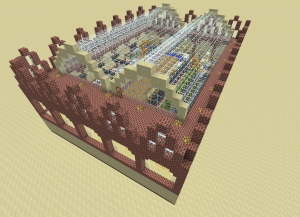
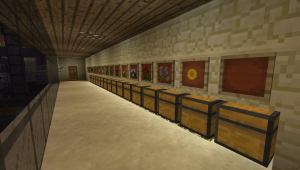
This is not a new concept, instead it is just an implementation of a massive item sorting system in Minecraft. I already posted this on planetminecraft, but I thought it would be sensible to post it here as well.

  • Can sort up to 432 stackable items
  • Sorts out non-stackables into separate chests
  • Sorts out potions into separate chests
  • Overflow-protection, sadly, somewhat noisy
  • Filters are already pre-configured, but chests are (mostly) empty
  • The load/framedrop comes from the item frames, not the hoppers or the
    pistons
  • two manual inputs, one for items to smelt/cook, one for the rest
  • two input hoppers to connect farms
  • incorporates workspaces, brewing stands and enchanting area, and has
    some little space left for more
  • footprint 56x56x10, the schematic is a bit bigger to accomodate for
    the floor and the inputs from farms
Item Sorting System - Overview

Item Sorting System – Overview

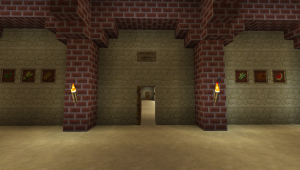
Item Sorting System - View From The Entrance

Item Sorting System – View From The Entrance

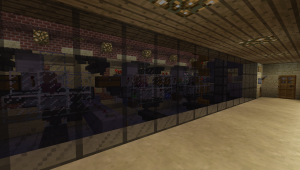
Item Sorting System - Upper Maintenance Floor

Item Sorting System – Upper Maintenance Floor

Item Sorting System - Brewing Stands

Item Sorting System – Brewing Stands

Item Sorting System - Enchanting Area

Item Sorting System – Enchanting Area

Of course here’s

The license is CC-by-sa.

Minecraft: Silent Dropper Item Elevator

Sunday, May 22nd, 2016

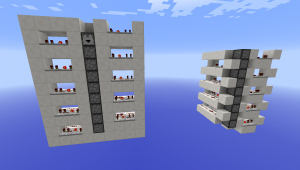
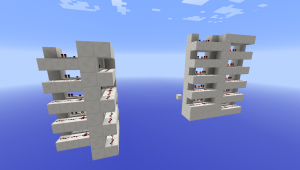
This is an older design of a silent dropper item elevator. It’s not initially by me, but it could be that I modified it. Still, I think it’s one of the best designs, because:

  • silent
  • items can be inserted at any level
  • Either has a footprint of 2×9 or can be arranged in an L-shape.
Silent Dropper Item Elevators, Front

Silent Dropper Item Elevators, Front

Silent Dropper Item Elevators, Back

Silent Dropper Item Elevators, Back

It does have a problem, and that is that sometimes the dropper(s) that get fed with items can get filled up and stuck.

Anyway, here’s the schematic:

Minecraft: Most Efficient Branch Mining Technique

Sunday, November 1st, 2015

There are a lot of hearsay and rumours on what is the most efficient mining technique in minecraft. I decided to test them.

Setup

The setup consists of 4 chunks, adding to 64×64 blocks, with a height of 16, from the bottom of the world up. I tried with one chunk only, but the results were inconclusive, since I managed to stumble upon chunks that did not contain certain resources at all. Since diamonds happen to be the most sought-after resource, and they only appear on height-levels 16 and below, I capped the setup there. These 4 chunks were then copied with mcedit, it’s resources counted with the “analyze” function of mcedit and then mined according to specific patterns. After this, I used mcedit again to count the new remaining totals.

The chunks were chosen more or less randomly, but so that they did not contain any lava or air. The setup has 65536 blocks in total, of which are 12222 bedrock, resulting in 53314 mineable blocks.

Efficiency is determined by the most resource-blocks mined for the least amount of blocks mined in total. It is completely irrelevant whether the chunks still contain resources after mining, as the minecraft world is infinite.

The Patterns

The patterns were aligned so that they cover as much of the height up to 16 blocks and down to bedrock; they were also aligned so that bedrock wouldn’t disturb the mining too much, so only the pattern with peekholes actually has tunnels within the uppermost layer where bedrock can occur, because since there are very few tunnels, this was deemed acceptable.

The green blocks signify visible blocks, red invisible ones. The bottom is left red because it consists mainly of bedrock.

Tunnels separated by two blocks, vertically aligned

 Tunnels separated by two blocks, vertically aligned

Theoretical amount of tunnel air-blocks is 11264, visible are 27136 other blocks, per tunnel air-block are 2.41 blocks visible. Coverage of mineable blocks is 72%.

Usually this is chosen by inexperienced players, who think they do have to get every resource within a certain space.

Tunnels separated by two blocks, vertically diagonally aligned

 Tunnels separated by two blocks, vertically diagonally aligned

Theoretical amount of tunnel air-blocks is 11008, visible are 32704 other blocks, per tunnel air-block are 2.97 blocks visible. Coverage of mineable blocks is 82%.

This makes it immediately clear that this option is much better than the first version. For about the same amount of blocks mined, the ratio to visible blocks and the overall coverage is much bigger. Actually, depending on how the two patterns are aligned to each other, it is possible that both need exactly the same amount of tunnel air-blocks; and this pattern covers 20% more space.

So if you still think you need to get every resource within a certain space, this is still much better a pattern than the above.

Tunnels separated by three blocks, diagonally aligned, one space

Tunnels separated by three blocks, diagonally aligned, one space

Theoretical amount of tunnel air-blocks is 8192, visible are 23552 other blocks, per tunnel air-block are 2.875 blocks visible. Coverage of mineable blocks is 59%.

The theory behind this is, that ores usually appear in veins, consisting of 2 to 20 blocks within some three.dimensional space. Thus the chance to stumble upon ore should not be greatly diminished by the added space.

Tunnels separated by three blocks, diagonally aligned, two spaces

Tunnels separated by three blocks, diagonally aligned, two spaces

Theoretical amount of tunnel air-blocks is 6144, visible are 18432 other blocks, per tunnel air-block are 3 blocks visible. Coverage of mineable blocks is 46%.

The same as above, but with one space added in the vertical direction.

Tunnels, separated by ten blocks, with peekholes every two blocks

Tunnels, separated by ten blocks, with peekholes

Theoretical amount of tunnel air-blocks is 7944, visible are 23704 other blocks, per tunnel air-block are 2.97 blocks visible. Coverage of mineable blocks is 59%.

This also relies on the fact that ores rarely only occupy one block in a certain axis. Also, the use of peekholes instead of tunnels leads to less tunneling that needs to be done, for very similar numbers as the tunnels separated by three blocks, diagonally aligned with one space. This one also has the added benefit that mobs cannot spawn in the peekholes.

Tests

From the above, one could easily conclude that the pattern with the biggest visibility per tunnel-block or the pattern with the biggest coverage would be the most efficient. But this would only be the case if resource were distributed uniformly; instead they’re distributed random, and in bunches. Since we don’t have any numbers or mathematical model on that, we test instead.

Mined was every block needed for digging the tunnels, and every visible resource block from there. If mining that resource block turned another resource block visible, that one was mined too. Sometimes another block was mined as well, if that was needed to get to a visible resource block.

Baseline is our setup, which 53314 mineable blocks, of which we have:

Uninteresting Blocks 51518
Gold Ore                47
Iron Ore               382
Coal Ore               818
Lapis Ore               40 
Diamond Ore             38
Redstone Ore           471

And these are the results of the first two tests done. I will refrain from testing the 2 rectangular pattern, since its obviously inferior to the 2 diagonal one. I might do the other two pattern as I find time. Numbers are what’s left in the ground after mining:

                     2 Diagonal    Peekhole
Uninteresting Blocks 40613          43531
Air (Tunneled out)   12497           9710
Gold Ore                 4              8
Iron Ore                48             46
Coal Ore                89             83
Lapis Ore                4              1
Diamond Ore              5              4
Redstone Ore            56            111

These are very similar, except the first version needed a lot more tunneling for the same amount of resources. And the first version covers a whopping 82% of the whole space, while the second one covers only 59%; which makes it quite obvious there is something going on with ore bunching.

This makes the pattern with peekholes roughly 128% as efficient, and just as thorough, as the tunnels separated by two blocks arranged diagonally.

Minecraft: 1891 Fruit Co. Fully Automatic Farm

Monday, July 6th, 2015

This is the reviced version of my Semi-Automatic Farm (which was called 1890 Fruit Co.) for Minecraft.

1891 Fruit Co. Building 1891 Fruit Co. Building
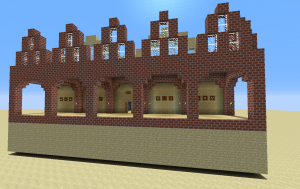
it’s gotten much smaller, less than half the volume

1891 Fruit Co. Front Front

And it produces much more different fruit

1891 Fruit Co. Entrance Entrance

1891 Fruit Co. Reception View Reception View

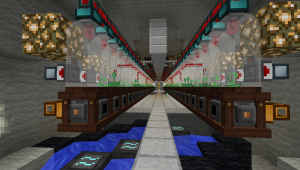
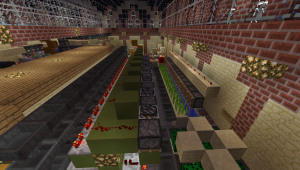
It produces patatoes, carrots, wheat, bread, seeds, pumpkins, melons, cactus, sugar cane, poppies, dandelions, peonies, roses, lilacs and sunflowers. And other flowers in low quanties.

1891 Fruit Co. Output Produce

All you need to do by hand is feeding in copious amounts of bonemeal. Everything es is automated (and the produce gets sorted; except the less common flowers). The farms for patatoes, carrots, wheat and bread will work without bonemeal, albeit very slowly. The flower farms won’t.

1891 Fruit Co. Factory Floor Right Factory Floor Right
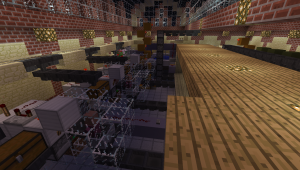
1891 Fruit Co. Factory Floor Left Factory Floor Left
The schematic

The license of these files and my screenshots is the OPL 1.0 or CC-by-sa.

Minecraft: Baroque Windmill

Monday, May 11th, 2015

This has been lying about on my disk, so here’s just a quick post with it:

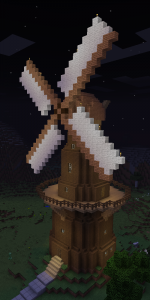
To make my Minecraft world a bit more lively, I did an 18th Century windmill to place into it:

18th Century Windmill

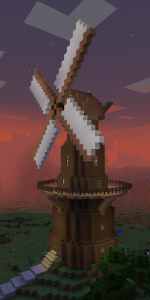
And another view, at sunset:

18th Century Windmill

It’s based upon an english windmill of around 1750. The interior isn’t exactly as it should be, with minecraft lacking round things. I just did an approximation of it with placeholders. And of course, here’s the schematic for mcedit.py:

18thCenturyWindmill.schematic.

The license of these files and my screenshots is the OPL 1.0 (which is about the same as CC-by-sa).

Minecraft: Castle Good Hope Construction Site

Tuesday, November 18th, 2014

I somehow lost interest in this (more on that later), so it’s basically a construction site, but I thought I write up how I constructed it.

I was looking around for some more baroque things I could build, maybe a small fortified city or something like that. Initially I came upon the Peter & Paul Fortress in St. Petersburg, but I could not find any useful plan or schematic.

And then I found this: Castle Of Good Hope, Overview. It has a scale, measures around 240×240 meters, and the layout looks gorgeous. The picture has around 2 pixel per meter, so that can be scaled easily. This star-shaped fortress was built between 1666 and 1682 by the Dutch East India Company (VOC).

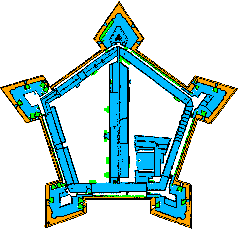
I loaded the layout into gimp, fiddled around with the colours so that the black pixels were blacker and thicker, and the colours deeper. Then I made a custom palette with five coulors: black, white, orange, blue, green, and converted the image from RGB to indexed with that palette, replaced white with alpha, and rotated it 60 degrees counterclockwise (because I wanted the walls of the building in the middle to be straight). Finally I scaled it to 50%. Which gave me this: GoodHope

This image I then converted to an mcedit-schematic. There’s some free online-tools which can do this, some standalone programs and even some mcedit filters. Which gave me this: Floorplan Schematic which of course is not very precise. This I placed on the ground with mcedit, and then I started building up, while interpolating and correcting.

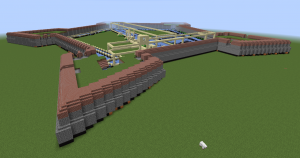
This is how it looks right now, from a bit up the ground

CastleGoodHopeView

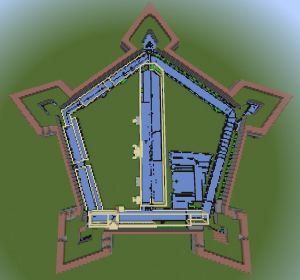
And from above:

CastleGoodHopeFromAbove

Including the woollen plan beneath it, and with various sandstone blocks to mark where buildings should go.

Now, if you take a close look (or look at a View of Castle Good Hope or a Closeup of the Gate of Castle Good Hope) you realize what this consists of: Basically (granite) cobblestone topped off by red brick! Ugh!. That was the moment I slowly started to decide that I would not finish this.

Add to this that I could not find an elevation-plan of it (only of the earlier square-shaped fortress) and various details remained opaque (although google map view of Castle Good Hope helped a bit; you can see where stairs are), I decided to leave it after I’ve brought into some kind of shape.

So if anyone wants to continue this (perhaps someone frome cape town?) I publish it here. License is public domain, you can do whatever you wish with it. It’s in 1:1 scale, as accurate as possible. The walls are maybe 70% done, although I don’t know if I’ve got the height right, and the topping-off is a bit higher, since I wanted to have half-slabs on top to stop spawning. Also, there’s only grass where It didn’t interfere with the rest of the walls. The Oranje and Leerdam bastions have their gun emplacements, Buuren only two of the five it should have; the rest none yet. And I’m not quite happy with how they look. The entrance lacks everything. The buildings are somewhat staked out, some with approximate height.

The world save is just what you can see in the pictures, the schematic however is the walls only, so you can put it into your world and fill in the rest with whatever you want.

Here they are